Visual and Auditory Signals During March
Translation details
Model:mistral-large-2512.Translated text
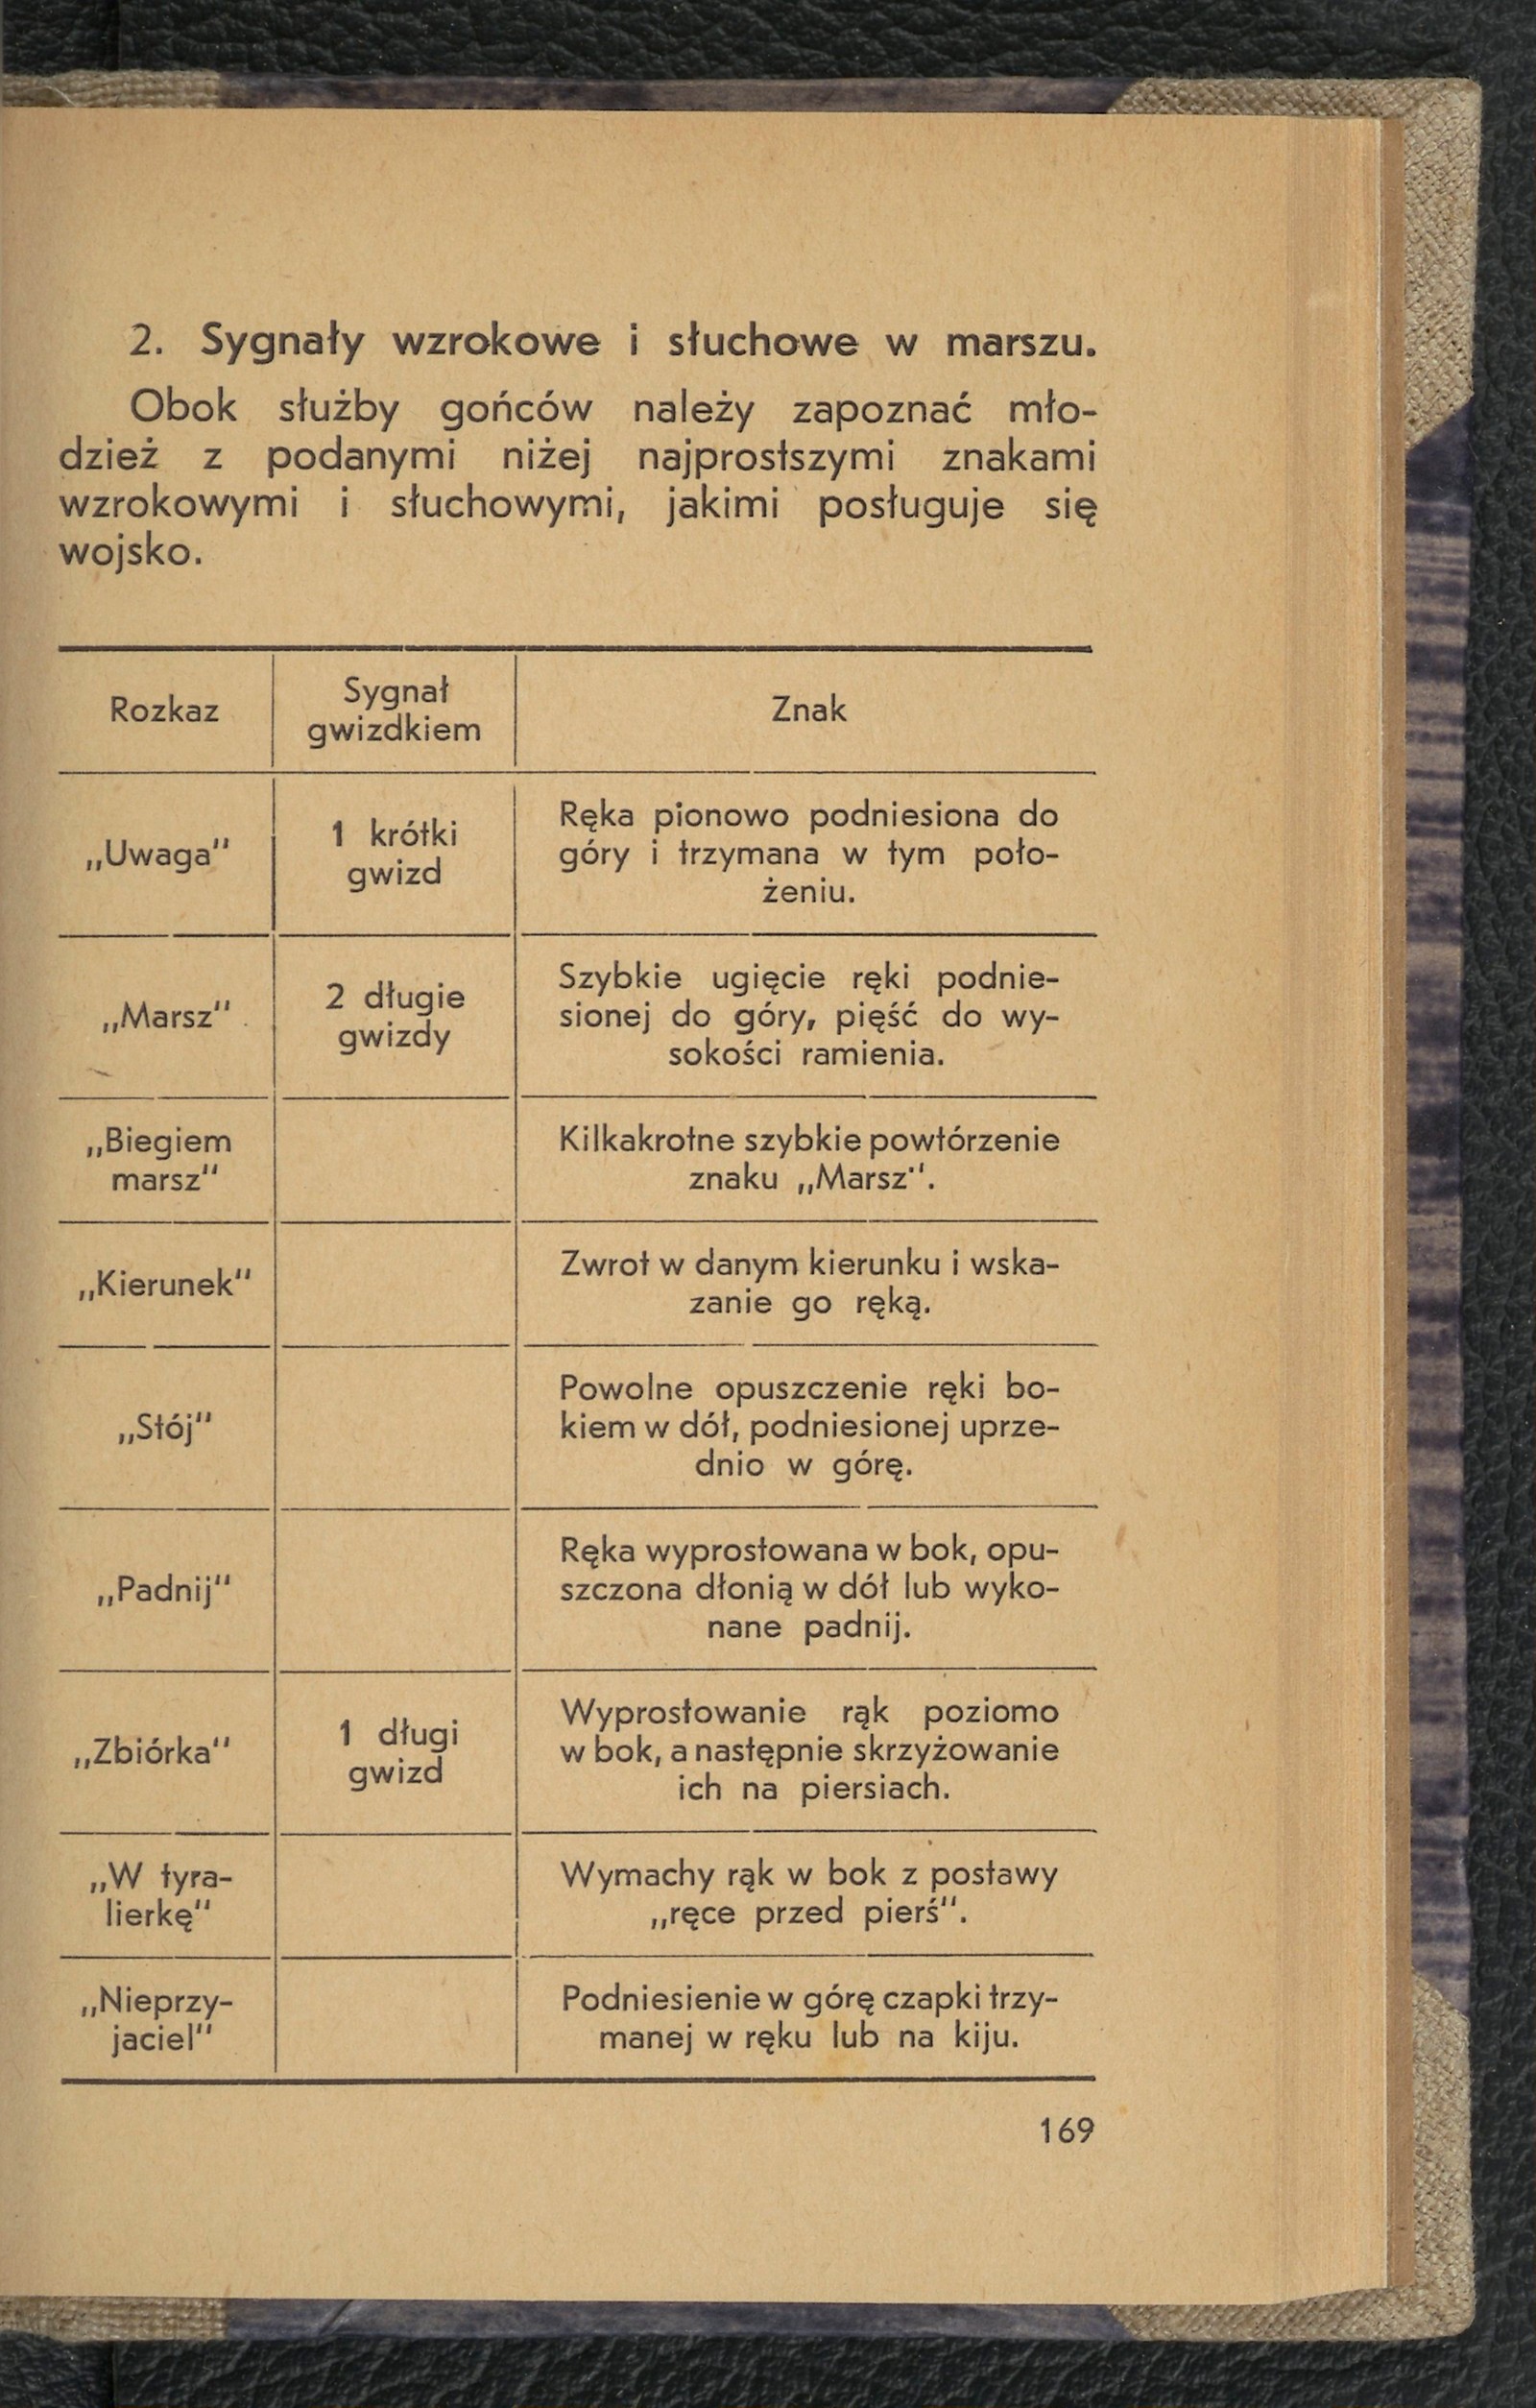
Section titled “Translated text”Alongside the use of messengers, young people should be familiarized with the simplest visual and auditory signals listed below, which are used by the military.
| Command | Whistle Signal | Sign |
|---|---|---|
| “Attention” | 1 short whistle | Arm raised vertically upward and held in that position. |
| “March” | 2 long whistles | Quick bending of the raised arm, fist at shoulder height. |
| “Double time, march” | Repeated quick execution of the “March” sign. | |
| “Direction” | Turn in the given direction and point with the hand. | |
| “Halt” | Slow lowering of the arm sideways downward, previously raised upward. | |
| “Take cover” | Arm extended to the side, palm facing downward or the action of taking cover. | |
| “Assembly” | 1 long whistle | Extending arms horizontally to the sides, then crossing them on the chest. |
| “Skirmish line” | Swinging arms to the sides from the “arms in front of chest” position. | |
| “Enemy” | Raising a cap held in the hand or on a stick upward. |
These signals will be practiced during protected march and approach march as commands from the leaders of individual teams.
During a protected march, the leader should be positioned with the scouts or the point.
Methodical training of visual and auditory signaling in the field.
In scouting groups or others that include Morse or Semaphore signaling in their training, we can conduct a series of games that will accelerate learning and make the results more fruitful. Interest and necessity will be the incentive for faster, practical mastery of the alphabet. However, even in groups that do not study signaling, the following games can be an excellent way to diversify activities and bring participants closer to this knowledge. As a rule, we do not consider the fact that young people may not know the Morse or Semaphore alphabet. Precisely, signaling games in the field are a method that teaches practical use of the agreed-upon alphabet.
In the initial learning phase, each participant should have the individual alphabets noted in a notebook or on a sheet (prepare machine-printed copies of the Morse alphabet) in a clear form so that at any moment one can recall certain signs. It will not harm anyone if individual trainees glance at the sheet. They will more easily memorize the signs. However, in the later stages of training, the use of an alphabet notebook should not be allowed.
Training should begin with the direct method—demanding that young people repeat the actions performed by the instructor.
Morse Alphabet According to Exercise Groups
Section titled “Morse Alphabet According to Exercise Groups”| I gr. | II gr. | III gr. |
|---|---|---|
| e . i . . s . . . u . . . . 5 . . . . . | † — m — — o — — — ch — — — — O (zero) — — — — — | a . . — u . . — v . . . — 4 . . . . — |
| IV gr. | V gr. | VI gr. |
| u — . d — . . b — . . . 6 — . . . . | g — — . w . — — p . — — . x — . . — | c — . — . r . — . l . — . . f . . — . |
| VII gr. | VIII gr. | IX gr. |
| y — . — — k — . — 2 . . — — 3 . . . — — | 1 . — — — — j . — — — 9 — — — — . | ż — — . . 7 — — . . . . 8 — — — . |
Fig. 17.
The instructor begins by first showing the I group of the Morse alphabet (see fig. 17) or the I circle of the Semaphore alphabet (see fig. 17a). Then, they demand the immediate execution of the above signs by all trainees. It is good to arrange them in two rows facing each other (not only do they perform the signs, but they also see them in the correct arrangement). Practice the letters slowly at first. Then proceed to increasingly faster arrangements, eventually performing them at varying speeds and in different orders (randomly). Once the directions become mechanized, though not necessarily in perfect form for everyone, we can move on to the next II group or II circle, repeating the entire system, and so on. Meanwhile, we can apply the following games to individual groups or circles: 5, 6, 7, 8, and 9 listed below.
Once the arrangement of individual letters is understood with mechanized movement, point out the letters that are the reverse of each other in their position. Practice the aforementioned games again on these. For a break between the above games, practice:
Source scan: Polona / National Library, marked “Public Domain”. View scan — image 177.
Metadata
Section titled “Metadata”- Type: game
- Traits: Not stated in the source
- Source: Jan Jasiński, Gry i ćwiczenia terenowe (Harce terenowe) (1938)
- Printed pages: 169–172
- Digital edition: Digital edition · Source record
- Open the edition at the relevant page: p. 169
- Read the source text: gct-099